Most off-the-shelf dog hiking gear isn’t just inadequate; it’s designed with critical failure points that can ruin a hike and risk your dog’s safety.
- Proper harness fit is not about comfort, but about preventing gait inhibition and serious shoulder injury.
- The material of your dog’s booties matters more for preventing chemical burns from salt than for traction alone.
- A dog’s mental exhaustion from scent work is a powerful tool often overlooked in favor of pure physical exercise.
Recommendation: Shift your focus from brand names to the underlying principles of biomechanics and material science to truly judge if a piece of gear will perform or fail under pressure.
The perfect day on the trail with your dog: crisp air, stunning views, and the happy panting of your four-legged partner. We buy gear with this ideal in mind—a sturdy harness, a cool-looking backpack, maybe some booties for rough terrain. We assume it’s all designed for the challenge. But out on the trail, miles from the car, is when you discover the hidden flaws: the rubbing that turns into a raw hotspot, the buckle that snaps under tension, or the “all-weather” coat that does little to stop a shivering dog.
The common advice to “buy a good harness” or “bring water” is table stakes. It doesn’t prepare you for the nuanced reality of gear performance under stress. The real expertise lies not in knowing *what* to buy, but in understanding *why* most gear fails. It’s about recognizing the subtle design choices that separate a gimmick from a genuine piece of survival equipment. This is where we move beyond a simple checklist and into the mechanics of what keeps a dog safe, comfortable, and efficient in the wild.
This guide takes a different approach. Forget the marketing. We’re going to deconstruct the gear itself, focusing on the critical failure points most owners miss. We will explore the physics of thermoregulation, the biomechanics of a proper fit, and the material science that dictates whether gear will withstand water, salt, and abrasion. By understanding these principles, you’ll learn to see past the flashy colors and assess gear like an engineer, ensuring every piece you pack is an asset, not a liability.
In this deep dive, we’ll cover the non-obvious gear questions that truly define a safe and successful adventure. By examining the specific mechanics of each item, you’ll gain the expertise to make choices that protect your dog from injury and exhaustion.
Contents: Your Guide to Trail-Tested Dog Gear
- Why your short-haired dog needs a coat at 45°F even if they run?
- How to weight a dog backpack safely to avoid spinal injury?
- Rubber Grip vs Fleece Lined: Which bootie prevents salt burn in winter?
- The Harness Fit Error: Why armpit rubbing ruins the hike
- Where to attach the light: Collar vs Harness for maximum night visibility?
- When to start tick prevention before hiking in Lyme disease endemic areas?
- When to replace a collar: The buckle wear signs 90% of owners miss
- Why a 20-Minute Scent Walk Is More Tiring Than a 1-Hour Run?
Why your short-haired dog needs a coat at 45°F even if they run?
It’s a common assumption: a dog that’s running is generating heat, so they don’t need a coat in cool weather. This can be a dangerous mistake, especially for short-haired breeds. The issue isn’t just the ambient temperature; it’s a matter of thermoregulation dynamics. Smaller dogs and those with single-layer coats have a much higher surface-area-to-mass ratio, meaning they lose heat to the environment far more rapidly than a human or a heavily coated breed.
Even during exercise, the convective heat loss from wind and cool air can outpace their metabolic heat production. A scientific study on thermoregulation during exercise confirmed that smaller dogs must allocate a bigger proportion of their metabolism just to stay warm, making them more vulnerable. At 45°F (around 7°C), a short-haired dog without a protective layer is burning precious energy just to maintain core temperature, leading to premature fatigue and an increased risk of hypothermia once they stop moving.
A proper coat isn’t about fashion; it’s a crucial piece of performance gear that traps a layer of air against their body, dramatically reducing this heat loss. Watch for early warning signs like heat-seeking behaviors (curling up tightly, seeking shelter) or shivering. For breeds with minimal undercoats like Vizslas, Greyhounds, or Weimaraners, a performance-grade fleece or jacket is not optional—it’s essential for both safety and endurance on the trail.
For an added layer of security, especially for elderly dogs with decreased muscle mass or in extreme conditions, consider layering protection. A fleece tummy warmer can be worn under a main coat to protect the vulnerable core where significant heat is lost.
How to weight a dog backpack safely to avoid spinal injury?
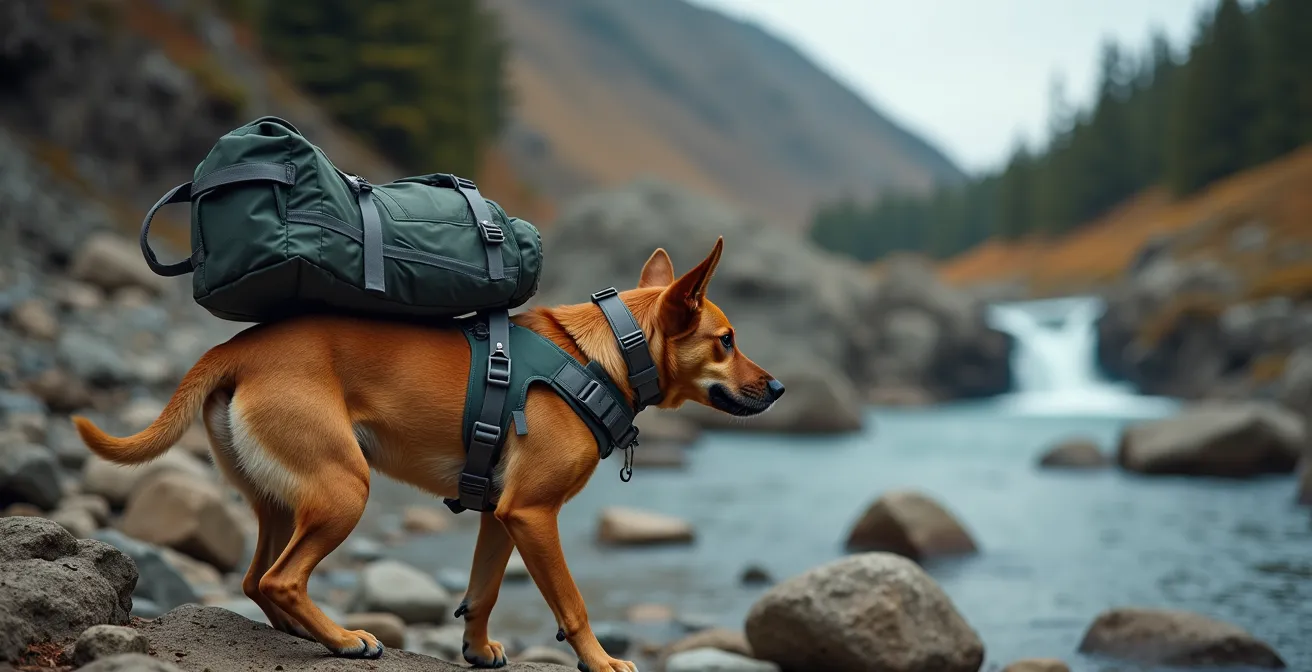
Equipping your dog with a backpack seems like a great way for them to carry their own weight. But loading it incorrectly is one of the fastest ways to cause discomfort, chafing, and even long-term spinal injury. The most critical rule isn’t just about the total weight, but its distribution. The pack must be balanced to place the load directly over the dog’s powerful shoulders, not drifting back towards the weaker lumbar region of their spine.
As a hard rule, seasoned experts recommend that the total weight should be under 25% of your dog’s body weight. For a 50-pound dog, that’s a maximum of 12.5 pounds, including the pack itself. A healthy, conditioned dog might handle this, but for a beginner or less athletic dog, starting with 10-15% is a much safer bet. The goal is assistance, not turning your dog into a pack mule. Overloading can lead to muscle strain, joint damage, and severe fatigue.
The key to safe carrying is achieving perfect load distribution over the strongest part of the dog’s anatomy—their shoulder girdle. The image below shows how a properly fitted and weighted pack should sit.
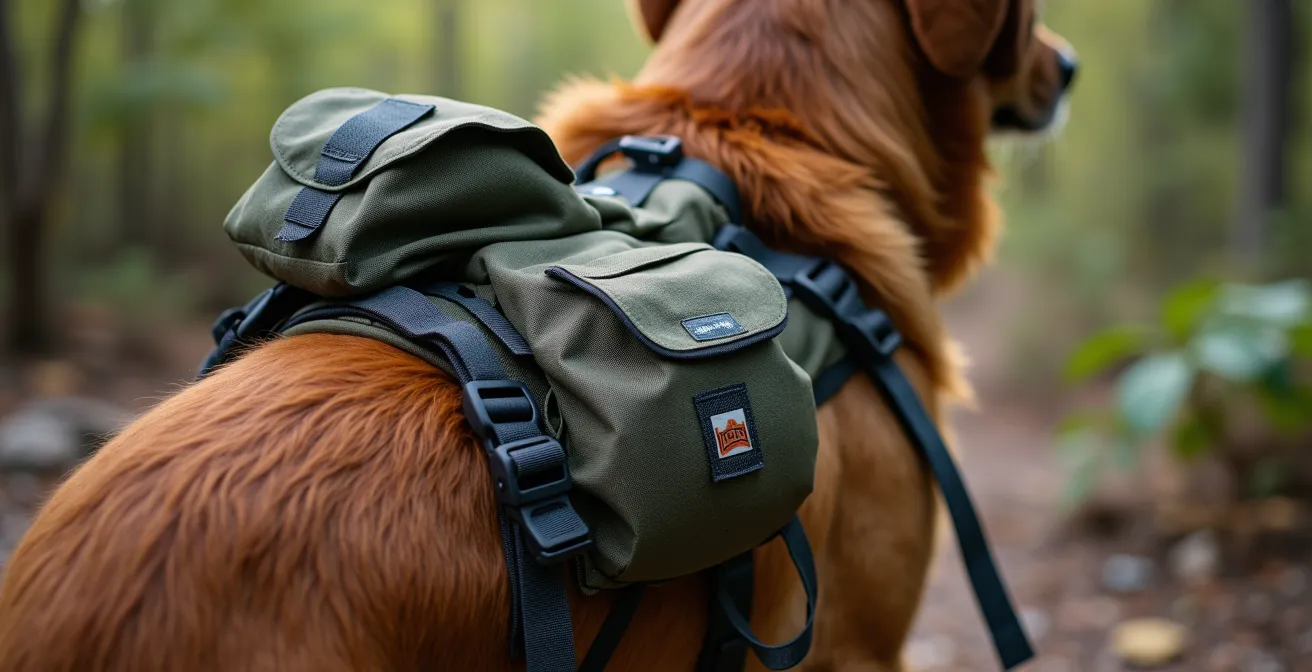
Notice how the saddlebags are positioned forward, ensuring the center of gravity is over the shoulders. When packing, place heavier items (like water) in the bottom and forward part of each pannier, and ensure both sides are equally weighted. An unbalanced pack will shift and rub, causing painful chafing and forcing your dog to adjust its gait unnaturally to compensate, which can lead to injury.
Rubber Grip vs Fleece Lined: Which bootie prevents salt burn in winter?
When winter hits, many owners reach for dog booties to protect paws from ice and cold. But the biggest threat on treated sidewalks and roads isn’t the cold itself—it’s chemical salt burn. De-icing salt, when it mixes with water or snow, creates a brine that can rapidly cause painful burns and cracking on your dog’s paw pads. Choosing the right bootie means understanding material properties beyond simple insulation.
A common mistake is assuming a soft, fleece-lined bootie is best. While cozy, fleece is absorbent. It can soak up the salty slush, holding the corrosive mixture directly against the paw pad and making the problem worse. A rubber-soled bootie offers a physical barrier, but the true hero for salt protection is a waterproof membrane. This feature prevents the salt-water mixture from ever reaching the paw in the first place. The following table breaks down how different features perform against winter hazards.
| Feature | Rubber Grip Sole | Fleece Lining | Waterproof Membrane |
|---|---|---|---|
| Primary Function | Traction & puncture resistance | Insulation & comfort | Moisture & salt barrier |
| Salt Burn Protection | Moderate (physical barrier) | Low (absorbs moisture) | High (prevents salt activation) |
| Breathability | Poor | Good | Variable (tech-dependent) |
| Ideal Conditions | Ice, rough terrain | Dry cold | Wet snow, salt |
| Durability | Excellent | Good | Very Good |
For ultimate protection against salt, the clear winner is a bootie with a waterproof membrane, often combined with a rubber sole for traction. However, an effective alternative, especially for dogs who resist booties, is paw wax. A case in point is Musher’s Secret, a dense wax originally developed for sled dogs. It creates a semi-permeable shield on the paw pads, offering a breathable barrier that protects from salt burn and ice buildup without inhibiting the natural feel of the ground. It’s a classic, field-tested solution that proves high-tech isn’t always the only answer.
The Harness Fit Error: Why armpit rubbing ruins the hike
Armpit chafing is one of the most common and painful gear failures a dog can experience on a hike. Most owners assume it’s just a matter of a harness being too tight, but the root cause is often a fundamental design flaw that inhibits your dog’s natural movement. This is the single most important aspect of biomechanical integrity in dog gear.
Many popular harnesses feature a horizontal strap that runs across the front of the dog’s chest, directly over the points of the shoulders. This design actively restricts the dog’s range of motion. As the respected Certified Canine Fitness Trainer Maria Christina Schultz points out in an interview on the topic:
Always ensure your dog has a well-fitted harness that doesn’t inhibit their natural gait or range of motion. Be mindful of harnesses with a horizontal strap in front that could inhibit a dog’s shoulder extension.
– Maria Christina Schultz, Certified Canine Fitness Trainer interview
When a dog’s shoulder extension is blocked, they are forced to alter their gait. This unnatural movement, repeated thousands of times on a hike, is what causes the straps to saw back and forth in their armpits, leading to severe chafing. The solution is a Y-shaped harness, which sits on the breastbone and leaves the shoulder points completely free to move, as shown in the image.
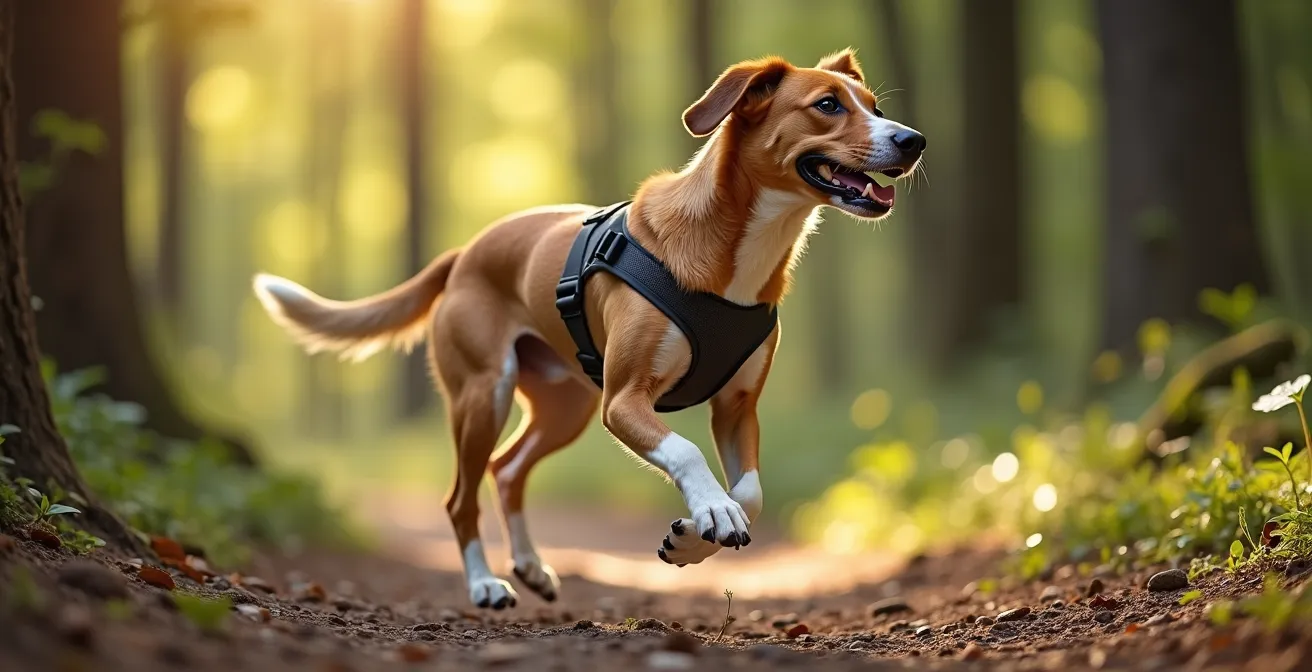
This design allows for full, natural shoulder extension, eliminating the primary cause of rubbing. But even with the right design, a dynamic fit test is crucial. A harness that seems fine when the dog is standing still might shift and bind once they start running and jumping. A static check is not enough.
Your Checklist for a Dynamic Harness Fit
- Design Check: Look for an open, Y-shaped shoulder design that allows for the least restriction of natural movement.
- Connection Points: Check for both front and back D-rings, which offer versatile leash connection options for training and control.
- Handle Test: Ensure any lift-assist handle is placed to distribute pressure over the torso, not create a pressure point on the spine.
- Movement Trial: Have your dog run, jump, and make sharp turns while wearing the harness. Watch closely for any shifting, gapping, or binding.
- Belly Panel Review: For technical terrain where you might lift your dog, verify the belly panel is wide enough to disperse lifting pressure evenly.
Where to attach the light: Collar vs Harness for maximum night visibility?
As dusk falls on the trail, a simple light becomes your dog’s most important piece of safety gear. But where you attach that light makes a huge difference in how visible they are. While clipping a beacon to the collar is easy and common, it’s a strategically poor choice for true visibility in varied terrain. The superior location is high on the dog’s back, attached to their harness.
The reason is simple physics. A collar-mounted light sits low, often obscured by the dog’s neck fur, and can easily dip out of sight when they lower their head to sniff or navigate a ditch. A harness-mounted light, however, offers a significant height advantage. This placement provides a 6 to 12 inches higher visibility point on the dog’s torso, creating a more consistent and reliable beacon that is less likely to be hidden by tall grass, dips in the trail, or the dog’s own body.
This elevated position means the light projects farther and is visible from more angles, giving you—and any oncoming cyclists or hikers—more time to react. It’s the difference between a light that’s occasionally visible and one that provides a constant, trustworthy signal of your dog’s location.
For the truly gear-obsessed adventurer focused on ultimate safety, the professional approach is a two-light redundancy system. This advanced setup, used by serious night hikers, combines two different types of lights for complete coverage. A primary, active flashing light is mounted high on the harness for long-range, all-weather visibility. This is your main beacon. A secondary, passive glow-in-the-dark or steady-on light is attached to the collar. This second light isn’t for distance, but for close-range identification and providing a backup if the primary light fails or is obscured from a specific angle. This belt-and-suspenders approach ensures your dog is seen, no matter the conditions.
When to start tick prevention before hiking in Lyme disease endemic areas?
In areas where Lyme disease is prevalent, tick prevention isn’t just a good idea; it’s a non-negotiable part of your dog’s health and safety protocol. The common advice is to “check for ticks,” but a truly effective strategy is proactive, not reactive. It begins long before you even set foot on the trail. The key is understanding the tick lifecycle and the critical window for disease transmission.
Once a tick attaches, it typically takes a critical 24 to 36 hours for transmission of the bacteria that causes Lyme disease. This gives you a window for removal, but relying solely on post-hike checks is a risky game. A single missed tick can have devastating health consequences. Therefore, the first line of defense must be a vet-approved preventative medication.
The question is, when to start? Don’t wait for the first warm day of spring. Ticks become active as soon as the ground thaws, which can be weeks before you plan your first hike. The safest protocol is to begin administering preventative medication at least 30 days before the historical first thaw in your region. This ensures the medication is fully systemic and effective by the time the first wave of ticks emerges. You have two main options to discuss with your vet:
- Oral Preventatives: These work systemically, killing ticks after they bite. They are highly effective but don’t stop the initial attachment.
- Topical Preventatives: These are applied to the skin and often have a repellent effect in addition to killing ticks on contact, which can prevent the bite from happening in the first place.
Regardless of which preventative you use, a thorough post-hike check remains a crucial second line of defense. Focus on the warm, hidden areas where ticks love to attach: in and around the ears, between the toes, in the armpits, and around the groin.
When to replace a collar: The buckle wear signs 90% of owners miss
A dog’s collar is often a “set it and forget it” piece of gear. But the slow, invisible degradation of its buckle is a ticking time bomb. A sudden collar failure on a busy trail or near a road can be catastrophic. Regular replacement isn’t enough; you need to know the specific signs of material failure points that 90% of owners completely miss.
Plastic buckles are the most common culprits. They are susceptible to UV degradation from sunlight, which makes the plastic brittle over time. A buckle that looks fine can have micro-fractures ready to snap under a sudden lunge. Metal buckles are not immune either; the pins in quick-release mechanisms can suffer from metal fatigue, and exposure to salt water can cause pitting corrosion that weakens the structure from the inside out.
Instead of guessing, perform a monthly inspection using this checklist. It will help you spot the subtle signs of impending failure before it’s too late:
- The Plastic ‘Flex Test’: Once a month, gently try to flex the prongs of the plastic buckle. If they feel stiff and brittle instead of pliable, the plastic has been degraded by UV light and is unreliable.
- The Metal Pin ‘Wobble Test’: For metal quick-release buckles, check the pins and springs. If there is any looseness, wobble, or if the closure doesn’t feel crisp and secure, metal fatigue may have set in.
- Stitching Inspection: The highest friction points are where the webbing is stitched around the buckle. Look for any frayed, fuzzy, or worn threads. This is often the first part of the collar to give way.
- Corrosion Check: Inspect all metal parts (buckle, D-ring) for any signs of rust or pitting, especially if you hike near the coast. Corrosion is a clear indicator the metal’s integrity is compromised.
- Closure Strength Test: The buckle should snap shut firmly and require deliberate force to open. If it closes too easily or feels “mushy,” the locking mechanism is worn out.
Key Takeaways
- A dog’s backpack load must never exceed 25% of their body weight and must be balanced over the shoulders to prevent spinal injury.
- A Y-shaped harness is biomechanically superior as it allows for full shoulder extension, preventing the gait restriction that causes painful armpit chafing.
- The chemical burn from de-icing salt is a greater winter threat than cold; a waterproof bootie or paw wax provides a more effective barrier than simple fleece.
Why a 20-Minute Scent Walk Is More Tiring Than a 1-Hour Run?
After a long run, your dog might still be bouncing off the walls. But after a short 20-minute walk where they’re allowed to sniff everything, they often collapse into a deep, satisfied sleep. This isn’t a fluke; it’s a testament to the incredible power of your dog’s nose and the concept of sensory ergonomics. The mental work of processing smells is far more exhausting than the physical work of running.
A dog’s sense of smell is their primary way of understanding the world. To put it in perspective, the part of a dog’s brain devoted to analyzing scent is, relatively speaking, 40 times larger relative to brain size than humans‘. When a dog is deeply sniffing, they are not just smelling; they are reading detailed stories about which animals have been there, what they were doing, and how long ago. This intense olfactory processing is a massive cognitive workout.
Furthermore, vigorous physical exercise like running can actively interfere with this process. A study on detection dogs found that “panting interferes with smelling and sniffing, which, in turn, makes the dogs less effective in their tasks.” A dog can’t effectively run and process complex scents at the same time. A forced-pace run or jog provides physical exercise but little to no mental enrichment. A “scent walk,” or “sniffari,” on the other hand, is the canine equivalent of reading a fascinating book. By allowing your dog to lead the way and investigate what interests them, you are satisfying a deep, instinctual need.
Engineering the perfect scent walk is easy and requires letting go of our human desire for distance and pace. Here’s how to do it:
- Use a Long Line: Swap your 6ft leash for a 15-30ft long line. This gives your dog the freedom to explore scents without pulling you off the path.
- Choose Novel Environments: A new trail offers a library of new smells, maximizing the mental engagement.
- Let the Dog Lead: This is the most important rule. This is their activity. Your job is to be the anchor, not the driver.
- Allow Deep Investigation: When they find a particularly interesting spot, stop. Let them sniff for as long as they want. This is where the real work happens.
Now that you can see your gear through the lens of biomechanics and material science, the next step is to apply this knowledge. Begin by auditing your dog’s current equipment not for how it looks, but for these potential failure points. This proactive mindset is the hallmark of a truly prepared and responsible trail partner.