Most pet ‘safety’ harnesses sold in stores are marketing ploys that will fail catastrophically in a crash, creating a false and deadly sense of security.
- Basic physics dictates that even a small, unrestrained pet becomes a high-impact projectile with lethal force in a collision.
- Generic, uncertified harnesses are proven to fail at critical points: buckles shatter, stitching tears, and webbing stretches, launching the pet forward.
- Only equipment that is independently crash-tested and certified to rigorous standards can be trusted to protect a pet during an accident.
Recommendation: Immediately discard any uncertified pet restraint. Your only safe choice is to invest in a harness or crate that is officially certified by an independent body like the Center for Pet Safety (CPS).
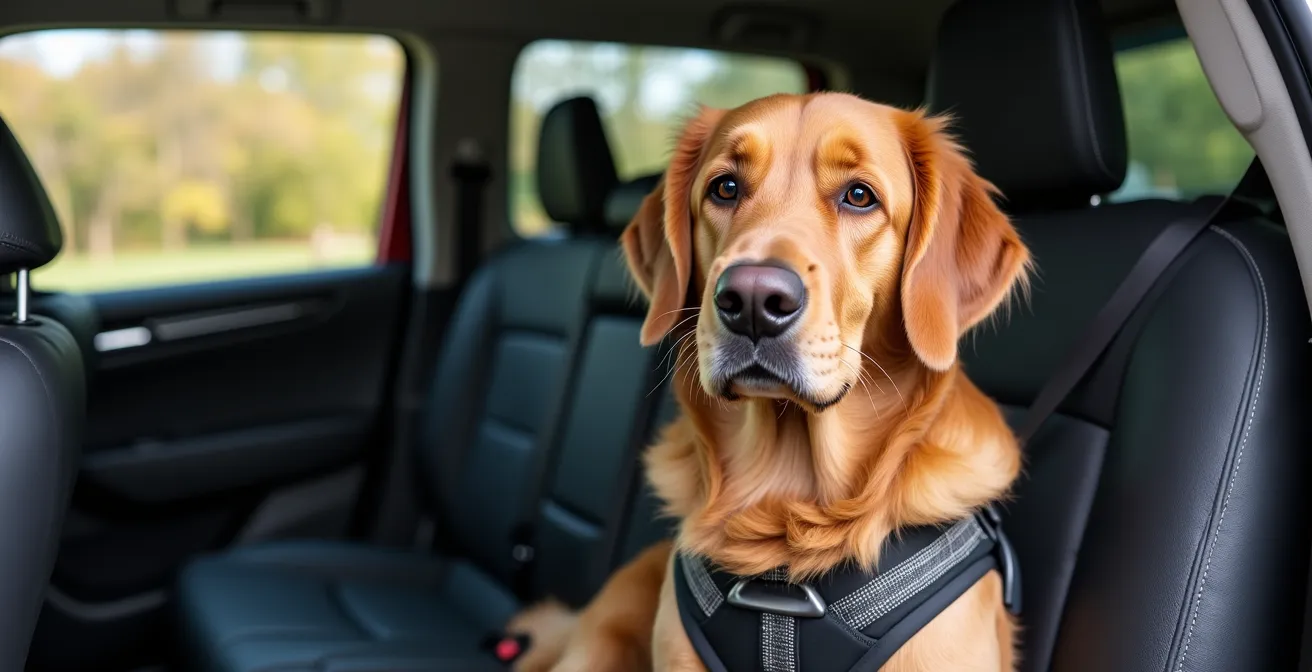
You buckle your dog into their car harness before every trip. You feel like a responsible, loving pet owner, taking the necessary precautions to keep your companion safe. As a crash test safety analyst, I am here to deliver an urgent and uncomfortable truth: that feeling of security is likely a dangerous illusion. The vast majority of pet “safety” products on the market are not engineered to withstand the brutal physics of a real-world collision. They are, in essence, a form of costume, providing the appearance of safety without any of the substance.
These products exploit a well-intentioned owner’s desire to do the right thing, but they fail when they are needed most. The difference between a marketing claim and an engineering certification is the difference between life and death. This analysis is not about shaming owners; it is about arming you with the data and physics-based evidence you need to see past the marketing and make a truly informed, life-saving decision for your pet. We will deconstruct the forces at play, examine the specific failure points of common equipment, and establish a clear, data-driven path to genuine pet safety on the road.
This guide provides a comprehensive analysis of the critical factors in pet vehicle safety. Below, you will find a detailed table of contents to navigate through the essential topics, from understanding collision forces to selecting properly certified gear.
Summary: A Crash Analyst’s Guide to Real Pet Safety in Vehicles
- Why a 10lb dog becomes a 300lb projectile at 30mph?
- How to anchor a travel crate so it doesn’t crush the pet in a rear-end collision?
- Sleepypod vs Generic Belt: Is the price difference worth the safety rating?
- The “Cracked Window” Myth: Why cars reach 100°F in 10 minutes even in shade?
- When to stop for water on a road trip to prevent dehydration?
- Why facial pheromones make a carrier feel safe during travel?
- How to weight a dog backpack safely to avoid spinal injury?
- When to start tick prevention before hiking in Lyme disease endemic areas?
Why a 10lb dog becomes a 300lb projectile at 30mph?
The most critical concept to understand in vehicle safety is force multiplication. An unrestrained object inside a moving vehicle carries the same kinetic energy as the vehicle itself. In a sudden stop or crash, that energy must be dissipated. For your pet, this translates into becoming a projectile. The simple formula is weight multiplied by speed. While the physics is more complex, a commonly used illustration from crash physics calculations demonstrates that an 80-pound dog in a car crash at 30 mph generates 2,400 pounds of force. A mere 10-pound dog, like a Miniature Pinscher, generates 300 pounds of force—enough to be lethal to itself and human passengers.
This is where generic “safety” harnesses fail catastrophically. They are not engineered to handle these forces. There are three primary points of failure. First is stitching failure; the single-stitched connections found on cheap harnesses are simply not rated for shock loads and tear apart. Second is plastic buckle breakage; consumer-grade plastic buckles are designed for leashes, not collisions, and they shatter under crash forces. Finally, webbing material stretch is a critical danger. Non-reinforced nylon can stretch excessively, allowing the dog to launch forward and strike the dashboard or front seats, causing severe or fatal injury despite the harness remaining “intact”.
How to anchor a travel crate so it doesn’t crush the pet in a rear-end collision?
For many owners, a travel crate seems like a secure alternative to a harness. However, an improperly secured crate is just a larger, heavier projectile. Furthermore, the structural integrity of the crate itself is a major factor often overlooked. The Center for Pet Safety conducted a landmark study in 2015 that exposed shocking truths about crate performance. The study revealed that most consumer-grade plastic crates experienced catastrophic failure, with door latches bursting open and the structures completely collapsing upon impact, offering no protection and often creating sharp, dangerous debris.
While aluminum crates maintained their structural integrity, the study highlighted a second, equally critical failure point: anchoring. Many owners use the flimsy cargo hooks in the trunk or cargo area to secure crates with bungee cords or weak straps. These hooks are not rated for crash forces and will break. The only safe method is to secure a crash-worthy crate using heavy-duty ratchet straps connected directly to the LATCH anchor points of the vehicle—the same system required for child safety seats. The crate should be positioned lengthwise in the cargo area, flush against the rear seatback to minimize movement in a rear-end collision.
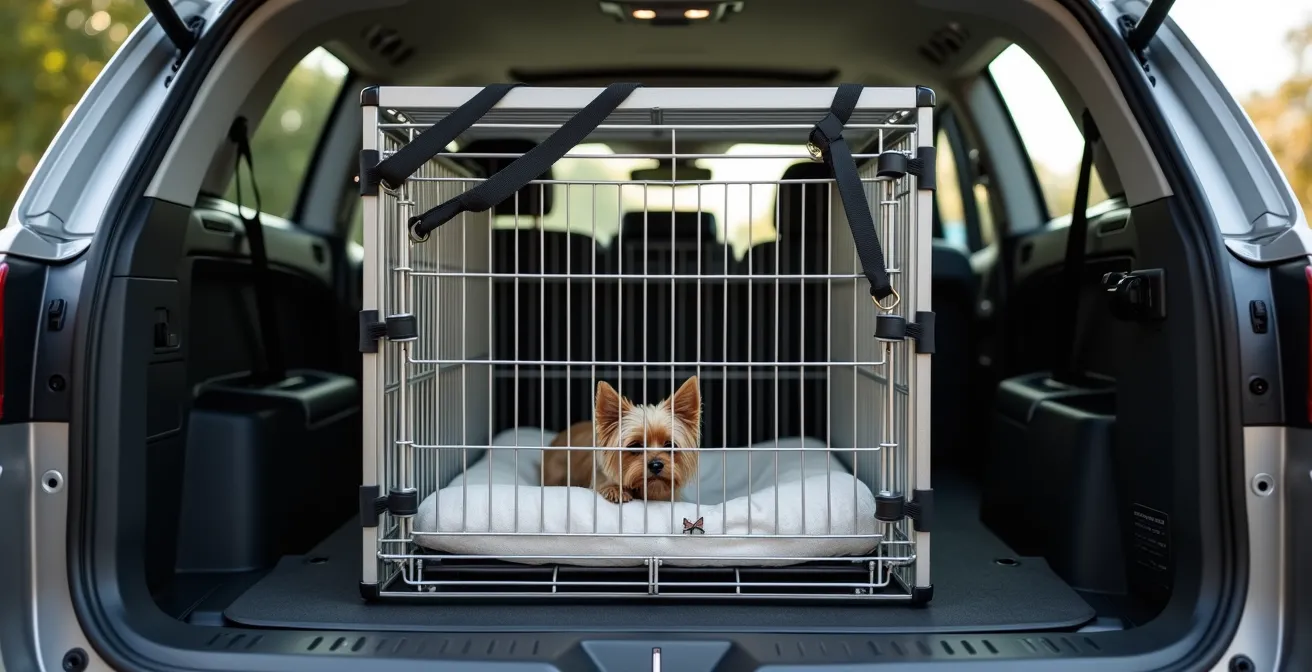
As the image demonstrates, a proper setup involves creating a secure, multi-point connection to the vehicle’s frame. This ensures the crate and the pet inside remain in place, absorbing impact forces as a single unit with the car, rather than becoming a secondary impact threat within the cabin. This is not a matter of convenience; it is a fundamental requirement of safe transport.
Sleepypod vs Generic Belt: Is the price difference worth the safety rating?
This question lies at the heart of the pet safety debate. Is a harness that costs nearly $100 truly that much better than a $20 version from a big-box store? From a crash analyst’s perspective, the answer is an unequivocal yes. The price difference reflects a fundamental divergence in purpose: one is designed to pass a crash test, the other is designed to be sold. The Center for Pet Safety’s 2013 harness study was a watershed moment, providing a stark, data-driven conclusion. In their own words, the finding was damning.
With the exception of the Sleepypod Clickit Utility, the harness products tested in 2013 were deemed insufficient in design, materials and overall performance
– Center for Pet Safety, 2013 Harness Crash Test Study
This single statement invalidates the safety claims of nearly an entire market segment. The difference isn’t marginal; it’s a chasm. A certified product is engineered as a complete safety system, whereas a generic product is an assembly of weak links. The following table, based on data from CPS-approved harness standards, illustrates precisely what you are paying for.
| Feature | Sleepypod Clickit (CPS Certified) | Generic ‘Safety’ Harness |
|---|---|---|
| Testing Standard | FMVSS 213 Child Restraint Protocol | No standardized testing |
| Crash Test Speed | 30 mph verified | Often untested or undisclosed |
| Hardware Material | Solid metal, stress-tested | Plastic buckles, prone to shattering |
| Webbing Type | Military-grade, reinforced stitching | Single-stitched consumer fabric |
| Head Excursion Control | Within FMVSS 213 limits | Allows dangerous forward launch |
| Price Range | $90-120 | $15-40 |
| Lifespan | 5-10 years with daily use | 6-12 months typical |
The data is clear. You are not paying for a brand name; you are paying for engineering, testing, and materials that have been proven to withstand the forces that would otherwise kill your pet. The price difference is not just “worth it”—it represents the entire value of the product’s life-saving function.
The “Cracked Window” Myth: Why cars reach 100°F in 10 minutes even in shade?
The danger inside a vehicle is not limited to collisions. One of the most insidious and misunderstood threats is vehicular heatstroke. Many owners believe that parking in the shade or leaving windows “cracked” provides adequate protection. This is a fatal misconception. A car acts as a greenhouse, trapping solar radiation and amplifying heat. The effect is astonishingly rapid; research on vehicle heat dynamics shows that an interior temperature can rise from 70°F to 104°F within just 10 minutes. After 30 minutes, it can reach 120°F.
Leaving a window cracked has a negligible effect on this temperature rise. The small opening does not allow for enough air circulation to dissipate the rapidly accumulating heat. A dog’s primary method of cooling is panting, which exchanges hot internal air for cooler external air. When the air in the car is as hot or hotter than the dog’s body temperature, panting becomes ineffective and can even accelerate dehydration and heatstroke. A dog can sustain irreversible organ damage or die in as little as 15 minutes. There is no safe amount of time to leave a pet in a parked car, even on a day that feels mild to you.
When to stop for water on a road trip to prevent dehydration?
Long road trips present another persistent threat: dehydration. The stress and anxiety of travel can increase a dog’s panting, accelerating water loss, while the controlled environment of a car means they aren’t able to seek water on their own. As a rule, you should plan to stop every 2 hours at a minimum to offer your pet fresh water. In warmer conditions, specifically in temperatures above 75°F (24°C), this frequency should increase to every hour. Anxious travelers who pant excessively may need a break as often as every 45 minutes.
While on the road, it’s critical to know the early signs of dehydration that you might otherwise miss. Don’t just look for a dry mouth. A more reliable indicator is tacky or sticky gums. You should also check for decreased skin elasticity by gently pinching the skin on their back; if it doesn’t snap back immediately, they are dehydrated. At each stop, offer about 2 ounces of water per 10 pounds of your dog’s body weight. However, never force them to drink. Small, frequent offerings are safer and more effective at maintaining hydration than large amounts, which can risk bloat, especially in deep-chested breeds.

Why facial pheromones make a carrier feel safe during travel?
While physical security is the highest priority, a pet’s psychological well-being is also a key component of travel safety. An anxious pet is more likely to pant excessively, become agitated, and suffer from stress-related health issues. Feline facial pheromones (and their canine-specific analogues) are a powerful tool for mitigating this anxiety. When a cat rubs its face on objects, it deposits these pheromones, marking the area as “safe” and familiar. Synthetic versions of these pheromones, available as sprays or diffusers, replicate this calming signal within a travel carrier.
However, their effectiveness depends entirely on proper application. A common mistake is spraying the carrier and immediately placing the pet inside. According to an ASPCA study on a pheromone activation protocol, the alcohol carrier in these sprays requires approximately 30 minutes to fully evaporate. If the pet is introduced too soon, the alcohol fumes can irritate their sensitive nasal passages, causing more distress. Proper use involves spraying the carrier’s bedding 30 minutes before departure. This allows the calming pheromone molecules to disperse and bind to the fabric, creating a reassuring environment that can reduce travel anxiety indicators by up to 60%, especially when combined with an item carrying a familiar scent from home.
Key takeaways
- An unrestrained 10lb dog becomes a 300lb projectile at 30mph due to kinetic energy.
- Generic harnesses fail due to buckle shatter, stitching tears, and webbing stretch; they are not crash-tested.
- True safety comes only from equipment certified to crash-test standards (e.g., CPS certified), which is proven to withstand collision forces.
How to weight a dog backpack safely to avoid spinal injury?
While our focus is primarily on vehicle safety, the principles of proper load-bearing and anatomical health extend to other travel and hiking activities. A dog backpack can be a great tool for exercise and giving your dog a “job,” but improper weighting can lead to chronic pain, gait changes, and even severe spinal injury. The total weight of the pack should never exceed 25% of your dog’s ideal body weight, and for most dogs, 10-15% is a much safer and more comfortable range. It’s not just about the total weight, but its precise distribution.
The key to safe loading is balance and placement. The weight must be perfectly balanced on both sides, and the heaviest items should be positioned directly over the dog’s shoulders, which is the strongest part of their back. Weight placed too far back, over the lumbar region, puts dangerous strain on the spine. You must actively monitor for signs of discomfort or poor fit both before and after a hike.
Action Plan: Safe Pack Loading Protocol
- Position heaviest items directly over the dog’s shoulders, never behind the ribcage or over the lumbar spine.
- Check balance by lifting the pack handle; it should hang level without tilting forward, backward, or to either side.
- Start conditioning with only 5% of your dog’s bodyweight, increasing by 2% weekly only if the dog shows no gait changes or soreness.
- Use a two-finger test: you should be able to slide two fingers comfortably between the pack and the dog’s body at all points to ensure no pressure spots.
- Monitor for asymmetric muscle development after each hike, as uneven shoulders can indicate a chronically unbalanced pack.
Following a strict protocol for pack loading is the only way to ensure this activity remains beneficial and does not cause long-term harm to your companion’s musculoskeletal system.
When to start tick prevention before hiking in Lyme disease endemic areas?
A final component of travel safety, particularly for those whose road trips lead to outdoor adventures, is proactive parasite prevention. Lyme disease and other tick-borne illnesses are a serious threat in many regions. A common misconception is that tick season is limited to the summer months. This is dangerously inaccurate. According to entomological research, tick nymphs, the tiny and often unnoticed stage of a tick’s life, become active at any temperature above 37°F (3°C), regardless of the season. This means that a single warm winter day can pose a significant risk.
Therefore, prevention must be started well before your planned trip, and its timing depends on the type of product used. Each method has a different activation time, and understanding this is crucial for ensuring your dog is protected the moment you arrive at your destination. A last-minute application of a topical treatment before a hike is not sufficient.
| Prevention Type | Time to Effectiveness | Duration | Best For |
|---|---|---|---|
| Oral (Isoxazoline class) | 2-12 hours for blood levels | 30-90 days | High-risk areas, swimming dogs |
| Topical Spot-on | 24-48 hours to spread | 30 days | Dogs that won’t take pills |
| Repellent Sprays | Immediate upon drying | 2-7 days | Short-term protection, combined approach |
| Tick Collars | 24-48 hours activation | 4-8 months | Long-term prevention, outdoor dogs |
Consulting with your veterinarian to choose the right product and starting the regimen with its specific activation time in mind is the only way to provide reliable protection. A road trip should be a source of joy, not a vector for chronic disease.
Do not wait for a tragedy to reveal the inadequacy of your equipment. The data is clear, the physics are undeniable, and the risk is real. Audit your pet’s travel gear today. Discard any non-certified harness, any plastic crate, or any improperly used restraint. Your pet’s life depends on this single, critical decision.